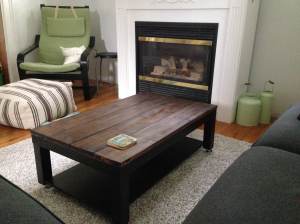
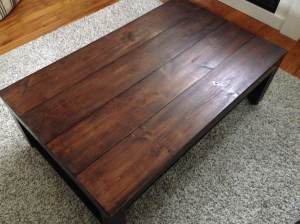
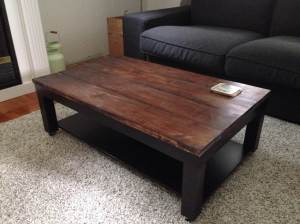
This is my transformed Ikea Lack coffee table. I was going for a rustic, reclaimed look, which I think I pulled off if you squint your eyes…LOL.
Actually, I’m really happy with the way this turned out. As with a lot of people out there, I own WAY too much Ikea furniture. It’s just so cheap and functional, especially when you have young kids. But I do get tired of the way it looks.
We recently moved to a new home so I wanted a new look without breaking the bank. Initially I thought I would make a whole new table from scratch but that started adding up so I decided to make over my Lack table. It’s nice to repurpose things too.
In order to get a rustic look I figured I could just stain and glue some wood right on top. I took to the internet to see if this had been done before and sure enough, it had (check out The Feminist Mystique’s tutorial). I also wanted the table to be low to work with our Kivik couch and on castors to make it easy to move out of the way for things like tummy time. 🙂
What you need:
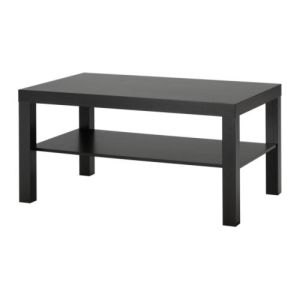
- Lack coffee table (the one we have measures 35 3/8″ X 21 5/8″)
- 4 pieces of 2x6x3 pine (that’s 2 pieces of 2x6x6 cut in half. Home Depot will cut it for you)
- 236ml can of Minwax Polyshades stain (I used the “Mission Oak” colour)
- Foam brushes
- Sandpaper (120 grit and 220 grit)
- Adhesive (e.g., wood glue, construction grade glue)
- 4 castors (1 1/2″)
- circular saw
Before you start:
Make sure the 4 pieces are cut evenly. If the Home Depot worker does a sloppy job (happened to me), or you don’t want an overhang, you can cut the pieces to exactly 35 3/8″ to fit the length of the table.
What you do:
1. Sand the 4 pieces of pine (with 120 grit). Make sure you sand in the direction of the grain. I actually had my husband sand them with a hand sander.
2. Stain the pine. I just used a foam brush to apply the stain. The Polyshades are a good option because it’s stain and polyurethane in one step. You only need 2 coats. Lightly sand in between coats with a finer grit (220).
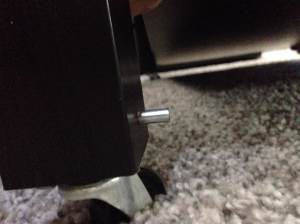
3. Before you glue the wood onto the table top, using a circular saw cut the legs off just under the metal pins that hold the shelf underneath the table.
4. Screw the castors on.
5. Apply the glue to the table top and the underside of the pine, one piece at a time. Place them carefully on the table top. Place something heavy on top while the glue dries. We used boxes of books that we haven’t unpacked yet. You could also use clamps. Wait 24 hours.
I have to say this was a relatively easy, quick and cheap (approx $50 for everything) way to remodel my coffee table. And I love the way it looks and that I can roll it out of the way.
We went from this:
to this:
Yay! 🙂
